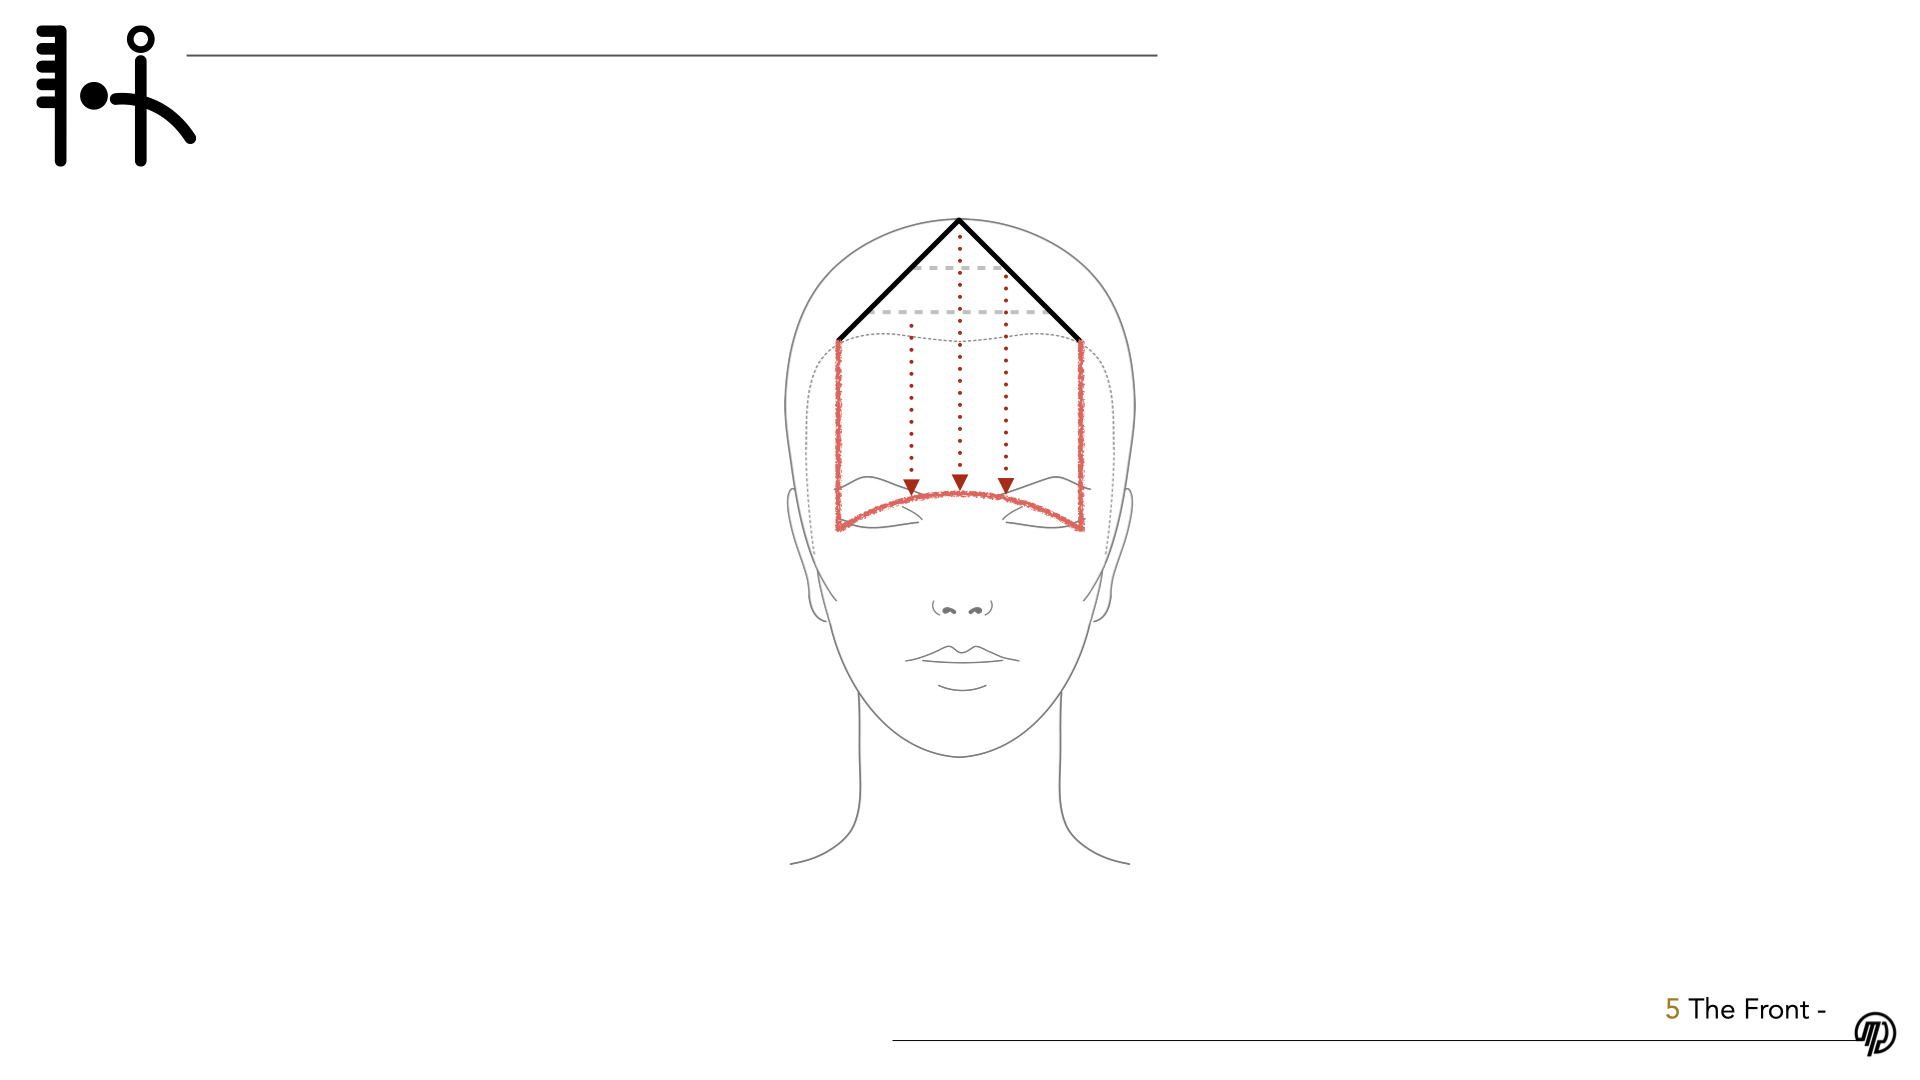
On the front view, draw the fringe section, mark the curved cutting outline, and add direction arrows. Check your drawing against Hiro’s front-view example below.
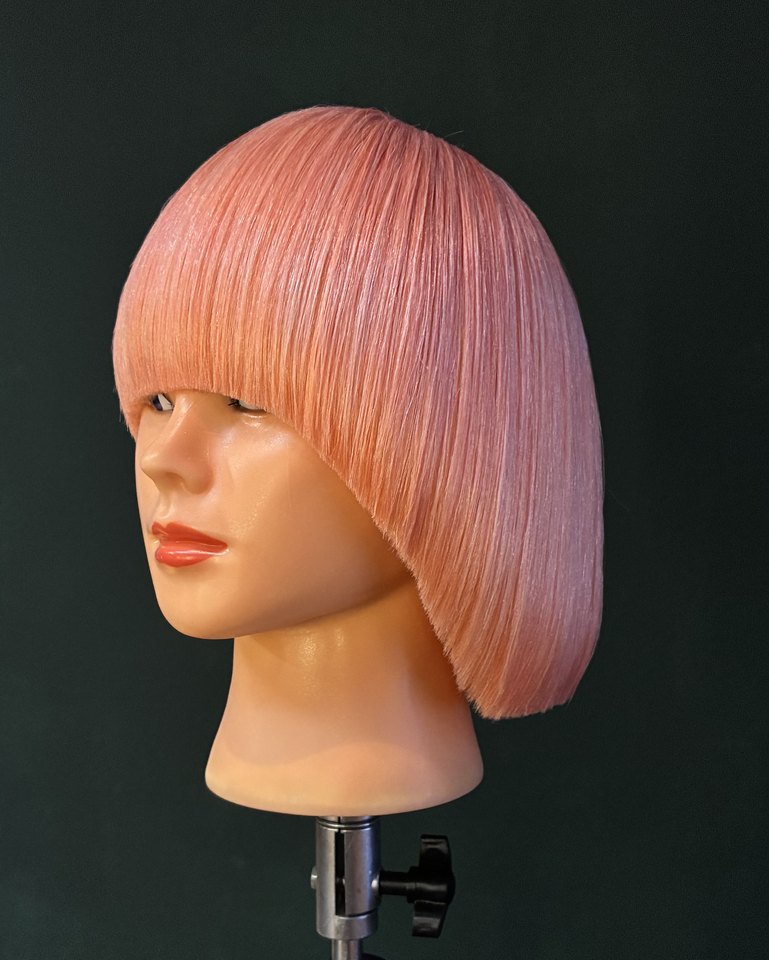
The photo is a reference for the finish. Use the head sheet to plan how you’ll create it.
Draw your cutting plan in four steps
Draw your section boundaries and number the order you’ll work in. Start with the top view.
Mark the first guide and show which sections use it. Draw the cutting line as a solid line.
Show elevation on the side view. Draw the strand away from the head and label the angle you intend to use.
Mark overdirection with arrows from the section towards the guide. If there’s none, write “natural fall” or “no overdirection”, as appropriate.
Draw with a finger, stylus or mouse. Pinch with two fingers to zoom and move around the sheet. Tap Move to drag the sheet, or Fit to screen to see the whole page.
Choose a preset, then draw. Use Notes to record any angles or directions you want to explain.
Use the dashed arrow to show where you direct the hair. Show elevation on the side view and record the angle in Notes.
More drawing tools
Layers (optional)
Use layers to organise your lines. You can draw normally with this panel closed.
Loading practice sheet…
My Practice SheetsExport and share
Compare your Round Line
Review your plan before cutting. Can another stylist tell where you start, which guide you follow, and how you elevate or direct each section?
Reveal the front-view example
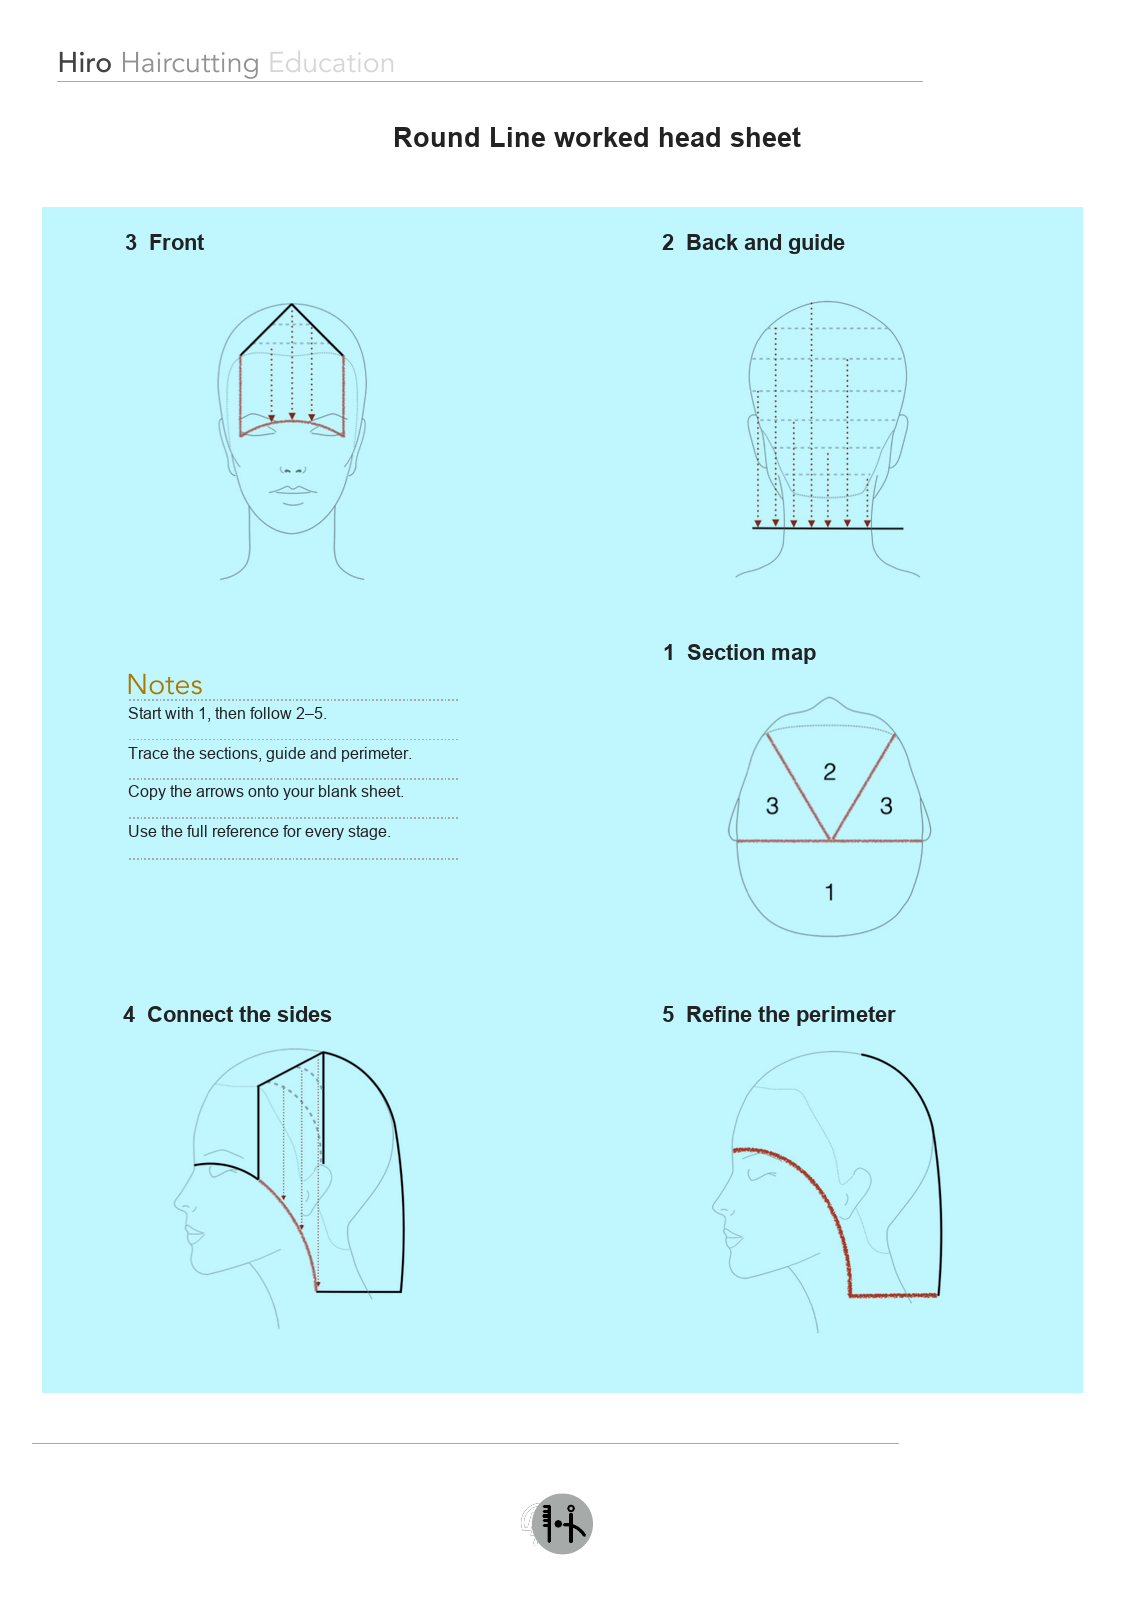
Follow examples 1 to 5 on the worked student sheet. The original reference uses its own colours and eight-step numbering. Open the full eight-step reference.
Top view: Check the section boundaries and their numbering.
Back view: Check the guide and where the arrows meet the cutting line.
Front view: Check that the fringe section, direction arrows and curve match the front reference.
Side view: Check how the front curve continues into the side and joins the back line.
Refinement: Compare the finished side outline with the refined perimeter.
Step 5 close-up — The Front
Compare your sectioning, direction arrows and curved cutting line with Step 5 (The Front). Open full-size diagram